Task Sections
Use Sections to keep related tasks together in a list. A trip might have Bookings, Packing, and At Home; a grocery list might have Fruit, Vegetables, and Pantry. Sections are available in regular lists and the Inbox.
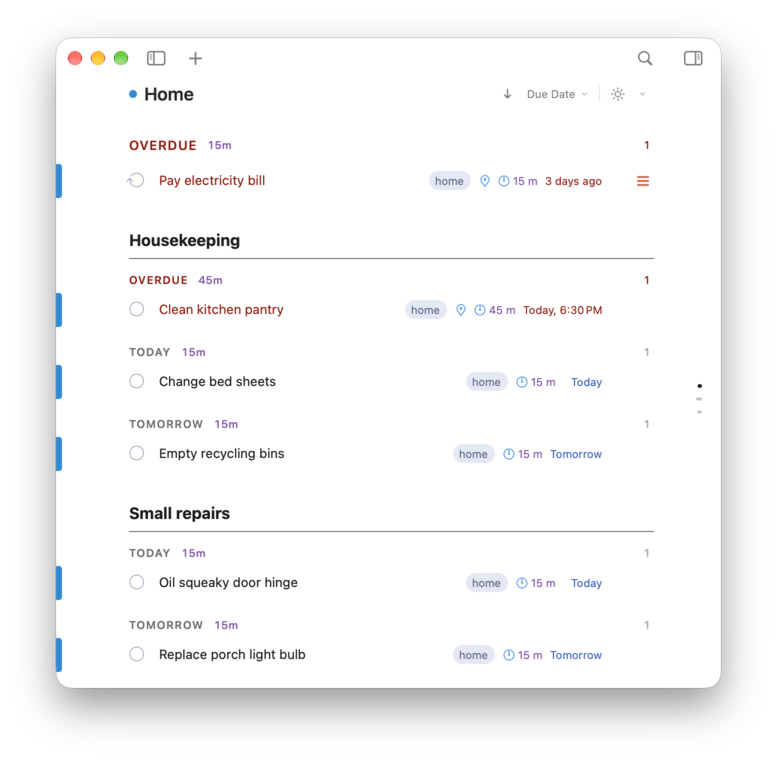
Move sections up or down to arrange your list. The tasks within each section follow the list's sort, such as Due Date or Priority.
How Sections Work
- Each section has a name and an optional description. Descriptions appear below the name on one line, with line breaks shown as spaces and long text cut off to fit.
- A section can hold tasks, projects, and checklists. Sub-tasks stay with their project or checklist, and each task belongs to one section at a time.
- Tasks that are not in a section stay at the top of the list, above the first section.
- A list sorted by Due Date shows date groups such as Today and Overdue in every section. Sort the list Manually and you arrange the tasks in each section yourself. See Sort Bar.
- When completed tasks are visible, the Done group appears below the last section. Completed tasks, projects, and checklists go there; completed sub-tasks stay with their project or checklist. Items in Done still belong to their sections and return there when marked as not completed.
Focus Lists such as Today, Smart Lists, and search results show tasks without sections.
Adding a Section
Add a section to the list you are viewing in any of these ways:
- Choose File > New > New Section (
⌃⌥⇧⌘N). - Open the dropdown on the
+button in the toolbar and choose Add Section. - Right-click any task and choose Add Section.
- Click the More button (⋯) on a section title, or right-click the title, and choose Add Section.
The new section follows the selected section or the section containing the selected task. Otherwise, it goes at the end of the list. Right-clicking a task selects it.
The section starts empty, with New Section selected so you can type a name. To group existing tasks, see Making a Section from Selected Tasks.
Making a Section from Selected Tasks
Select the tasks, right-click one of them, and choose New > Section from Selected Tasks. With one task selected, the command reads Section from Selected Task. 2Do creates the section, moves the tasks into it, and selects the name so you can type a new one.
The command is available when only tasks from the current list are selected. See Selecting Tasks.
Naming and Describing a Section
To rename a section, double-click its title, select the title and press Return, or choose Rename Section from the section's menu. The editor has two fields:
- Name: a single line.
- Description: as many lines as you need. Press
⇧Returnto start a new line. In the list, the description appears below the section title on one line.
Press Tab to move between the fields. To save, press Return or ⌘Return, or click elsewhere in the task list. Press Esc to close the editor without saving your changes. A new section exists as soon as you add it, so pressing Esc while naming one leaves it called New Section.
Selecting and Collapsing Sections
Click a section title to select it. Use ⌘-click or ⇧-click to select several.
To hide a section's tasks, click the arrow beside the section's name, or select the section title and press ←. Click the arrow again, or press →, to show them. The arrow appears when you point at the title of a section that has tasks, and it stays visible while the section is collapsed.
While you scroll through a section, its title stays pinned at the top of the list. When you move from one task's editor straight to the next, 2Do skips over the section titles in between.
Moving Tasks In and Out of Sections
- Drag: drop tasks on a section title, or among a section's tasks, to move them into that section. Hold
⌥while you drop to put copies there instead. - New tasks: select a section title, or a task in a section, and press
⌘N. The new task goes into that section. - Paste: select a section title and choose Edit > Paste (
⌘V) to paste copied tasks into that section. With several section titles selected, the tasks go into the section that comes first in the list. - Remove from Section: select top-level tasks in a section, right-click one of them, and choose Remove from Section. They leave their section, and the unfinished ones move to the top of the list, above the first section.
Moving a task into or out of a section keeps its dates, priority, and other details. If you move a sub-task into a section, it leaves its project and becomes a task in that section.
Arranging Sections
Drag a section title up or down to change the order of sections. You can also select one or more section titles and press ⌃⌘↑ or ⌃⌘↓, the same keys that move tasks in a list sorted Manually. Tasks without a section always stay above the first section.
The Section Menu
Point at a section title and click the More button (⋯), or right-click the title, to see what you can do with the section:
- Rename Section opens the name and description for editing.
- Duplicate Section adds a copy right below the original, with a new copy of every task in it, including projects and checklists with their sub-tasks. Completed tasks and sub-tasks are copied too, and the copies start out unfinished. 2Do then selects the copy's name so you can change it. With a section title selected,
⌘Ddoes the same. - Move Section… lists your other lists, grouped by List Group. Choose one to move the section and all of its tasks to that list. You can also drag a section title onto a list in the sidebar. To change the section's place among that list's sections, open the list and drag its title up or down.
- Convert to List creates a new list from the section in the same List Group (or under Lists when the section is in the Inbox), moves all of its tasks, projects, and checklists into the new list, and removes the section. Any section description becomes the new list's notes.
- Delete Section removes the section and keeps its tasks; the unfinished ones join the tasks at the top of the list. You can also select one or more section titles and press
⌫or⌘⌫. - Add Section adds a new section right after this one.
- Auto-Name Section, below a divider, names the section after its tasks. See Auto-Name Section.
Use Edit > Undo (⌘Z) to undo section changes, including deletion.
Copying Sections to Another List
Select one or more section titles and choose Edit > Copy (⌘C). Open another list, select a section title there if you want the copies to follow that section, and choose Edit > Paste (⌘V). Pasting a section also copies its tasks. You can copy sections out of a read-only list, but not change them there.
Organizing a List with Apple Intelligence
Use Apple Intelligence to organize tasks into sections or name a section you've already created.
Auto-Create Sections
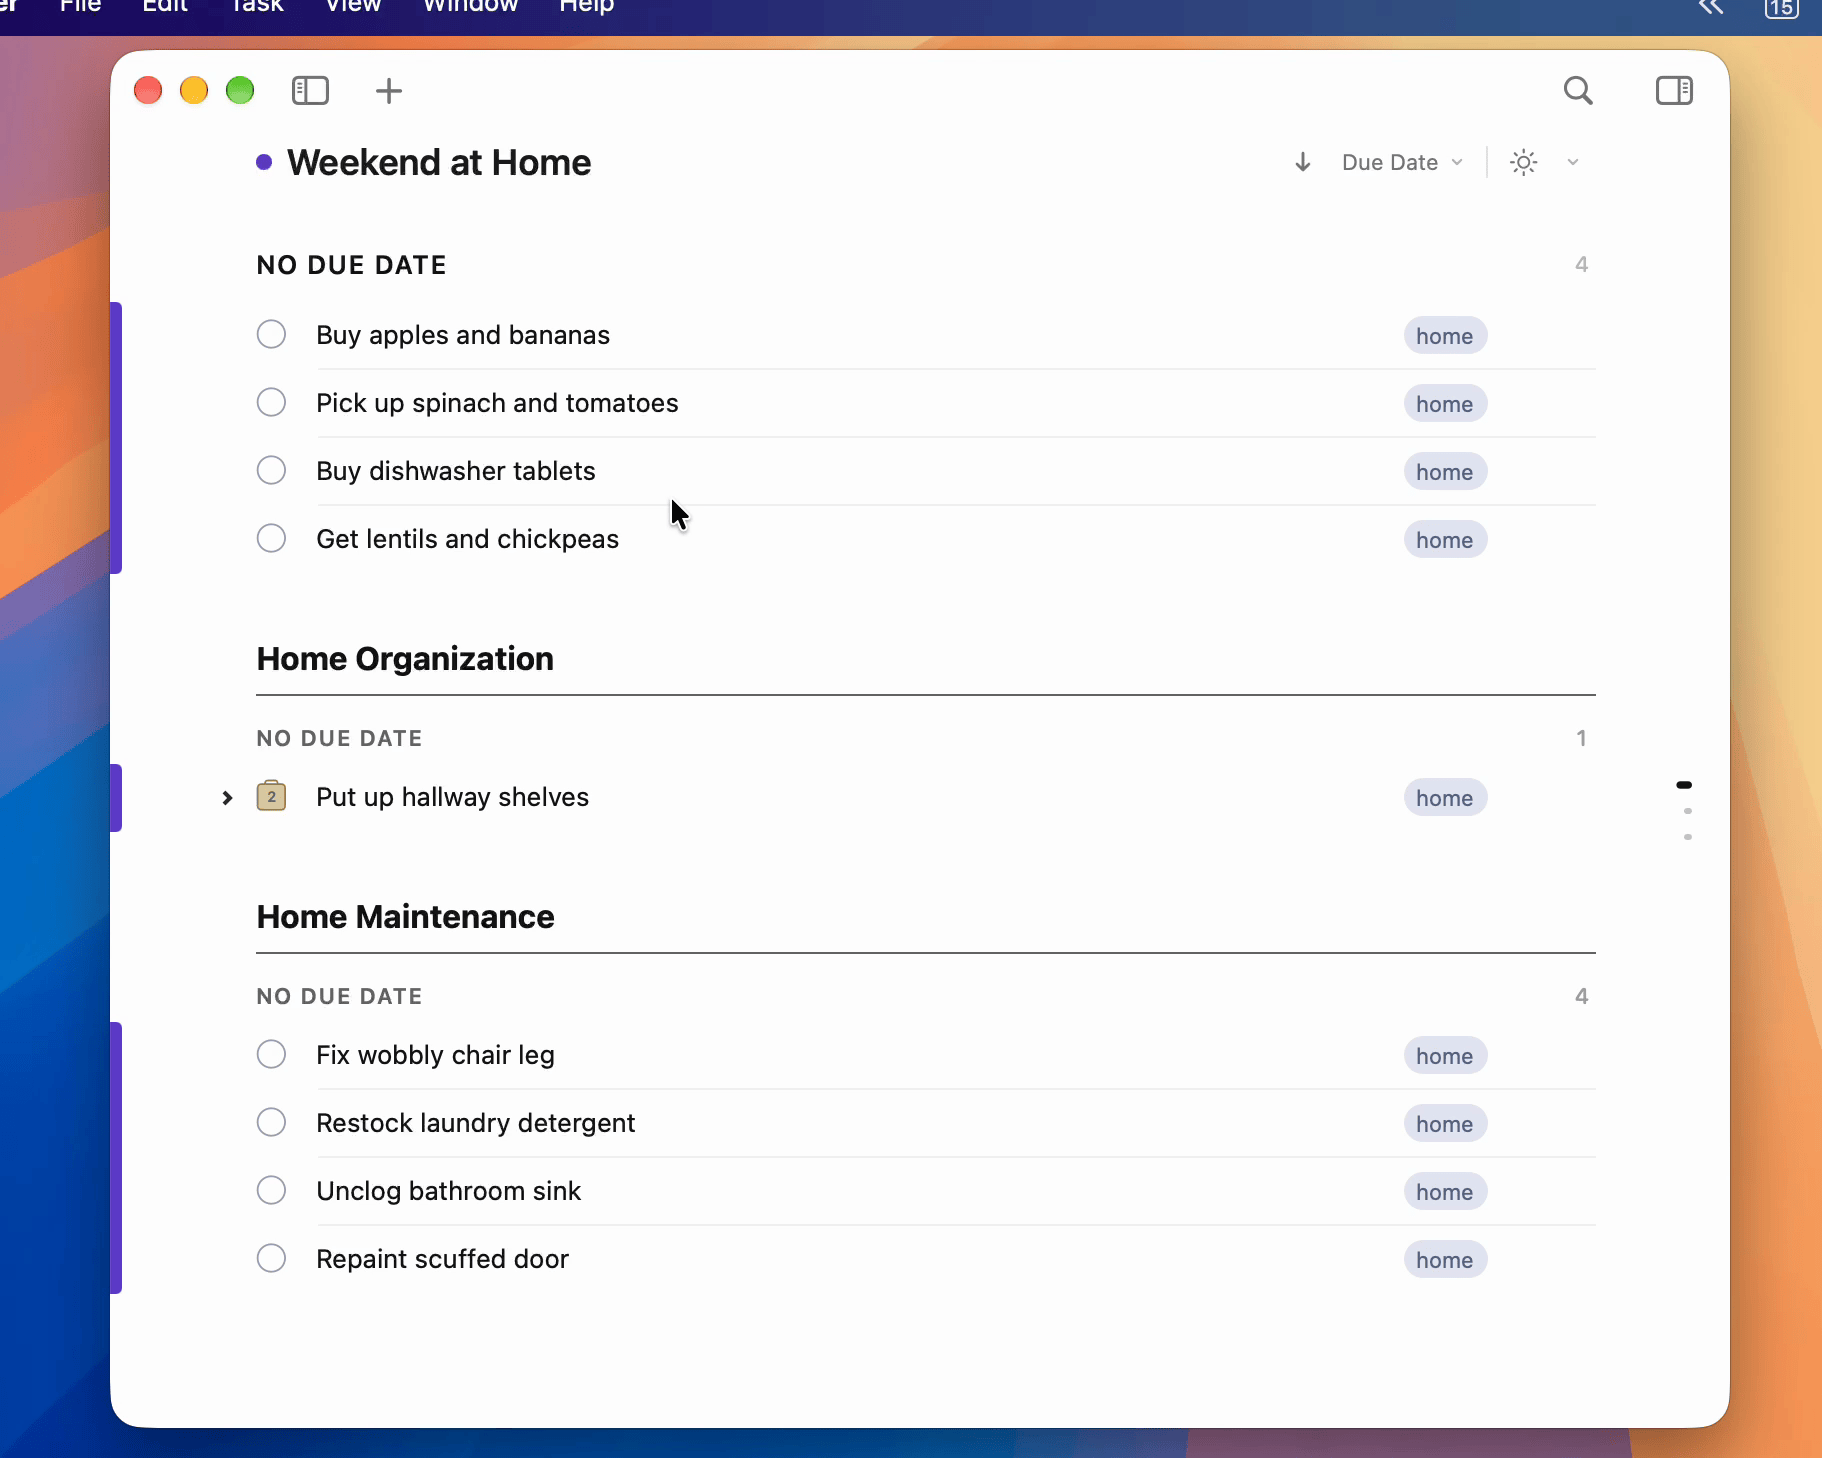
Auto-Create Sections organizes unfinished tasks by their titles. It prefers an existing section when the name fits the tasks, and creates a new section when none fits. For example, new grocery tasks can join your Fruit and Vegetables sections, with a new Pantry section added if needed.
Choose which tasks to organize:
- Selected tasks: open a regular list or the Inbox, select the tasks, right-click one of them, and choose Auto-Create Sections. You can also choose Task > Auto-Create Sections.
- All unsectioned tasks in a list: right-click the list name in the sidebar and choose Auto-Create Sections.
The first time, 2Do explains what the command does. Click OK to continue. A progress sheet appears; click Cancel to stop without making changes.
Select Do not show this message again to skip this prompt next time. To restore it, click Clear next to Confirmation warnings in Settings > General.
What changes:
- With selected tasks, only the unfinished tasks in that selection are organized. They can already belong to sections. Other tasks stay where they are.
- With the List command, all unfinished top-level tasks, projects, and checklists without a section are included, even those hidden from view. Tasks already in sections stay where they are.
- Existing section names, descriptions, and order stay unchanged. New sections appear after the existing ones, with names in the language of your task titles.
- A selected project or checklist keeps its sub-tasks. If you select a sub-task without its parent, it leaves the parent and becomes a top-level task in its assigned section. Completed tasks are skipped, though completed sub-tasks still move with a selected parent.
Tasks are organized only when you run the command. You can run it again to place new tasks in suitable sections.
To reverse the result, choose Edit > Undo (⌘Z). One undo puts the tasks back where they were and removes any sections the command added.
Auto-Name Section
Auto-Name Section gives a section a short name based on the titles of its tasks. Click the More button (⋯) on the section title, or right-click it, and choose Auto-Name Section.
The section is renamed immediately; its description and tasks are unchanged. 2Do uses the titles of its top-level tasks, projects, and checklists, including completed or hidden items. To go back to the old name, choose Edit > Undo (⌘Z), or rename the section yourself. An empty section can't be named this way.
What Apple Intelligence Reads
Auto-Create Sections reads the titles of the tasks it organizes and the names of existing sections. A selected project or checklist contributes its own title; a sub-task contributes its title only when selected without its parent. Auto-Name Section reads the titles of the section's top-level tasks, projects, and checklists. Neither command reads notes, dates, tags, or attachments. Apple Intelligence does the work on your Mac, and there is no account to create.
If the tasks being organized or the available sections change while 2Do is working, it stops without applying the result and asks you to try again. When organizing a selection, changes to unrelated tasks do not stop the command.
What You Need
The list must allow editing. These commands cannot change a read-only shared list or a read-only list from a sync service.
The two commands need a Mac that supports Apple Intelligence, running macOS 26 or later, with Apple Intelligence turned on in System Settings > Apple Intelligence & Siri.
- On a Mac that cannot run Apple Intelligence, the commands are not shown.
- If Apple Intelligence is turned off or still downloading, 2Do explains what to do when you choose a command.
- If Apple Intelligence doesn't support your language yet, 2Do says so and changes nothing.
Printing Sections
Choose File > Print... (⌘P) to open the print preview. Include Sections is on by default. Each section prints with its title, description, and sort groups, in the order shown in your list.
Turn it off to print one sorted list without section titles or descriptions. See Printing.
Sections and Sync
- iCloud and Dropbox sync sections between your Mac, iPhone, and iPad, with their names, descriptions, order, and tasks.
- Todoist syncs them as Todoist sections: the name, the order, and which tasks belong to each. Descriptions are not synced with Todoist.
- With other sync methods, sections are not synced. Your tasks still sync, and your other devices show them without sections.
Sections from Things
When you import from Things, Things headings become sections in 2Do, in the same order. The to-dos under a heading go into its section, and empty headings come across too.
On iPhone and iPad
For touch controls and other iPhone and iPad features, see Task Sections for iPhone and iPad.