The 2Do Window
The 2Do main window is divided into three panels and a few persistent controls. This page is a guided tour of every part you'll touch in day-to-day use.
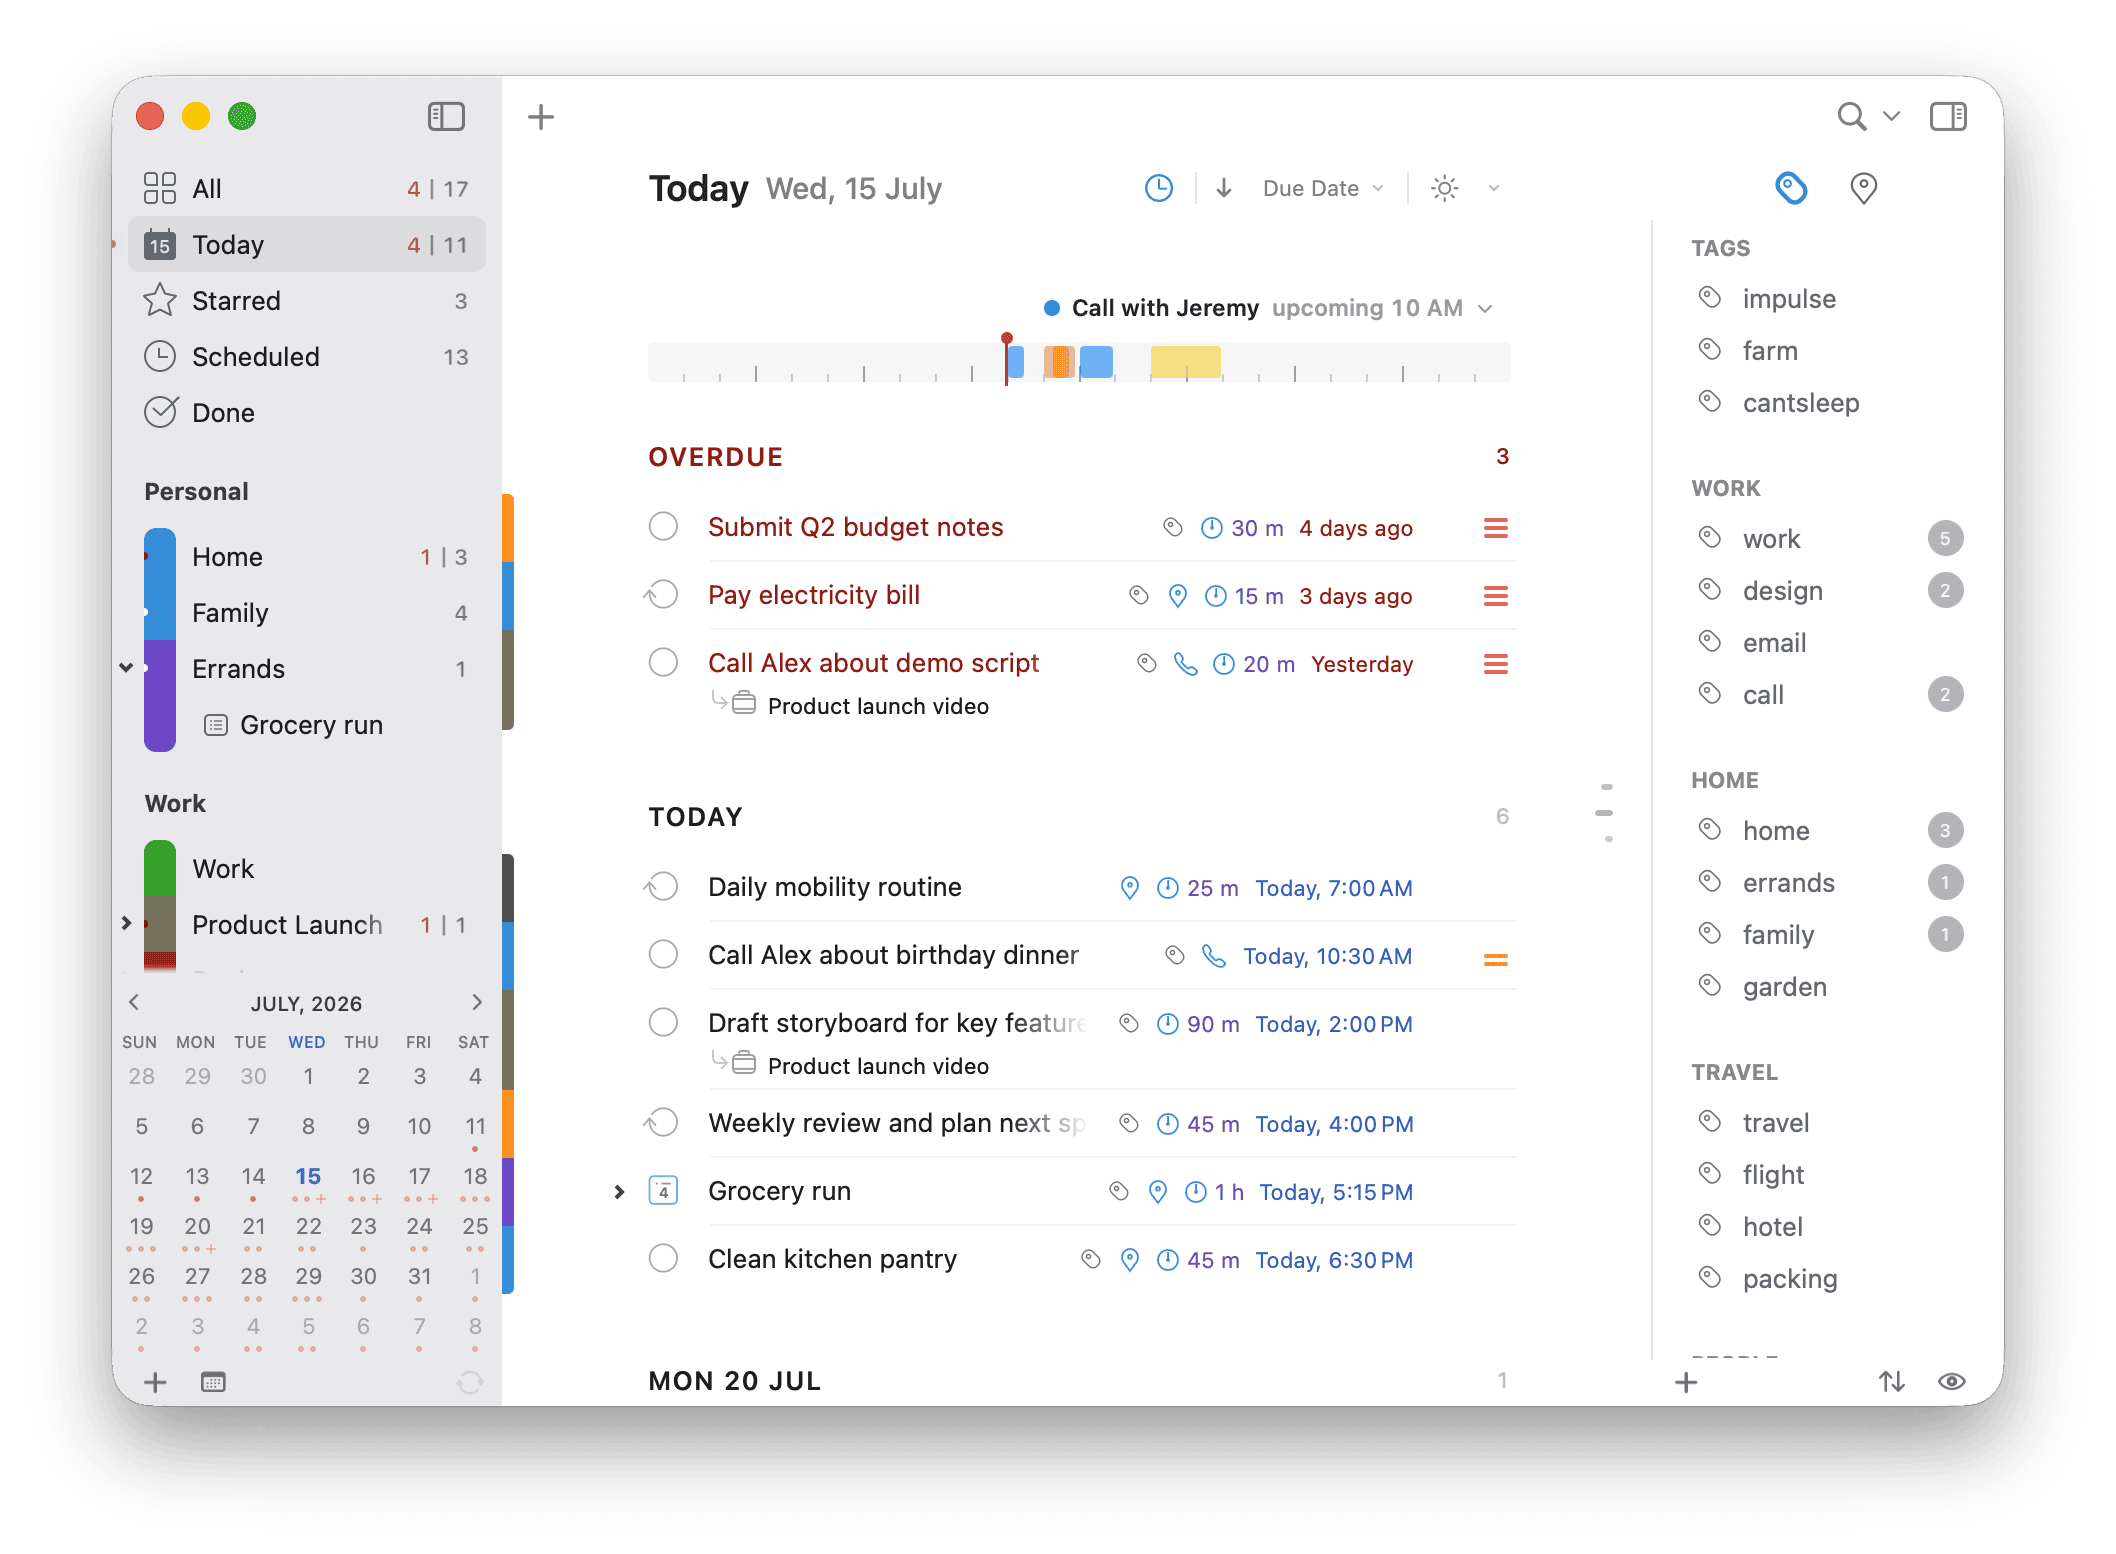
Lists Panel (Left)
The left sidebar contains your Focus Lists near the top (All, Today, Starred, Scheduled, and Done) and your real Lists and List Groups below them. If you've turned on the optional Inbox, it sits in its own group above the Focus Lists, and unlike them it is a real list. Lists that contain projects or checklists can expand to reveal them right in the panel, including ones the task list is currently hiding as paused or scheduled; paused ones appear slightly dimmed (see Lists and List Groups).
The bottom of the panel has a [+] button for creating new lists and list groups. To create a task directly in a list, use the small [+] on that list row or the main new-task button in the toolbar.
Collapsing the Panel
The Lists Panel is collapsible. Toggle it with View > Show Lists / Hide Lists (the menu title flips to match the current state), or click the Toggle List Panel button, the sidebar icon in the window header. The panel also auto-collapses when the window gets narrow and slides back into view when there's room again. A manual hide is sticky: once you hide it yourself, it stays hidden until you show it. Panel visibility is tracked per window, so each of your Multiple Windows can show or hide it independently.
Live Counters on List Rows
Each list row can show a live counter on its trailing edge: an animated number wheel whose digits roll as the count changes. Choose what it counts in 2Do > Settings > Today & Lists, under Counts on lists:
- None: no counters.
- Overdue items: counts only overdue tasks.
- Overdue + Undone: counts overdue plus remaining not-done tasks (the default).
Counts above 999 display as 999+.
Due-Today and Overdue Dots
A single small glowing dot can appear on the leading edge of a list's name, flagging tasks tucked inside it:
- A white dot means the list has a task due today hiding inside.
- A red dot means the list has an overdue task hiding inside. Overdue wins when both are true.
The dot never appears on the All, Done, or Scheduled rows. It's an at-a-glance way to spot which lists need attention without opening each one; handy when a list is collapsed inside a List Group or its tasks are filtered out of your current view. (A lock icon on a list instead marks a password-protected list.)
For details on lists, see Lists and List Groups.
Task List (Centre)
The middle of the window shows the tasks belonging to whichever list (or Focus List, Smart List, or project) is selected on the left. Tasks can be sorted by a wide range of fields: Status, Priority, To-do List, Start Date, Due Date, Creation, Modified, Note, Title, Tag, Location, Duration, and Manually (drag tasks into your own order). Manual order in the Focus Lists syncs only with iCloud. Due Date orders by due date and then due time; a task with no due time sorts at the end of its day, and alert times play no part. See Just a Due Date.
Sort orders are set from the Sort Bar's sort menu, and each list remembers its own. Two lists offer a different set:
- The Done list sorts by Priority, To-do List, Modified, Completion, Note, or Title. Completion orders tasks by when you finished them, and it's the one place that sort is available.
- Smart Lists offer everything except Manually. A Smart List is a live search rather than a container, so there's no fixed order to drag tasks into.
Sorting by To-do List groups tasks under one section per list, in the order your lists and List Groups appear in the Lists Panel. To sort those sections alphabetically instead, turn off Sorting by list uses your list order in Settings.
One Section, or Many
By default a sorted list breaks into section headers: by due date, priority, tag, and so on. The bottom of the sort menu has a Separated switch that turns this off: uncheck it and the headers disappear, leaving every task under a single All Tasks in <list name> heading.
It's a per-list choice, so you can keep a busy project grouped by date while a short errands list stays ungrouped.
The first column of every task row is a checkbox. Click it to mark complete. The right edge of the row shows badges (alarm, priority, tags, action) plus expand/collapse arrows for projects and checklists.
Collapsing Task Sections
When a list is sorted, its tasks group under section headers: by due date, priority, tag, and so on. Sections can be collapsed and expanded, and 2Do remembers each section's state. To fold or unfold everything in one move, ⌘-click (Command-click) a section header to collapse or expand all sections at once.
Section Heat Bars
Whenever the view has more than one section, a slim column of heat bars appears along the task list's right edge: one small horizontal bar per section. Each bar's length reflects how many tasks that section holds, so you can see which sections hold the most tasks. Rest the pointer on a bar to see the section's title and count in a tooltip, and click (or drag along the rail) to jump straight to that section, without scrolling. With a single section, the rail is hidden.
Action Button
If a task has an attached Action, an action icon appears at the far right of the row. It's an indicator rather than a button: to run the action (call, message, navigate, search, or open a URL) choose Task > Perform Action (bare P), right-click the task → Perform Action, or click the action icon in the task editor's hint bar.
Getting to a Task's Real Home
Two right-click commands help when the task in front of you isn't where it lives:
- Open in List...: you're in Today, a Smart List, or a search result and want the task in context. This switches to the list the task actually belongs to and selects it there, with everything around it.
- Goto Project...: the selected item is a sub-task, and this takes you to its parent project or checklist.
Attaching a File from the Menu
Alongside dragging files onto a task, the right-click menu has Link file..., which opens a file picker and adds the chosen file to the task's notes as a clickable link. Same result as a drag, useful when the file is easier to find in a dialog than in the Finder.
Drop Files, Photos, and Mail onto Tasks
The Task List accepts drops from other apps, and where you drop decides what happens:
- Drop files onto a task row to link them into that task's notes. Each file appears as a clickable link. Drop a photo and it becomes the task's picture attachment instead (a task carries one picture, so the first image wins).
- Drop files on the empty space below the tasks to create a new task, named after the first file, with the same treatment: an image becomes the attachment, everything else becomes note links. Inside Project View, the new task is created as a sub-task of that project.
- Drop a Mail message onto a task and it becomes the task's action: one click reopens the email in Mail. If the task already has an action, the message's subject and link are added to the notes instead. Drop the message on empty space and 2Do creates a new task titled with the subject, with the message as its action.
This is what travels between your devices:
- File links stay on this Mac. They point at files on your disk, so they aren't reachable from your other devices.
- Picture and audio attachments sync on services that support attachments (see what each sync method carries); on other services they stay on this Mac.
- Because 2Do is sandboxed, access to linked files is stored as macOS security-scoped permissions. After moving to a new Mac, reinstalling 2Do, or restoring a database, 2Do may ask you to grant access to a linked file again.
Utility Panel (Right)
The right panel is contextual. Two buttons at the top switch between:
- Tags: all your tags and tag groups, with counts. Click a tag's icon to filter the Task List. See Tags.
- Locations: a map and a list of tasks with locations. See Nearby and Locations.
Drag and drop works in both directions here. Drag a tag onto a task to apply it, or drag a selection of tasks onto a tag to tag them all at once (drop them onto a tag group and every tag inside is applied). The Locations panel works the same way: drag a location onto a task, or tasks onto a location.
Calendar events aren't a tab in the Utility Panel on Mac. Instead, 2Do shows your upcoming Calendar events above the task list: above Today by default, or across your lists if you prefer. See Calendar Events in Lists.
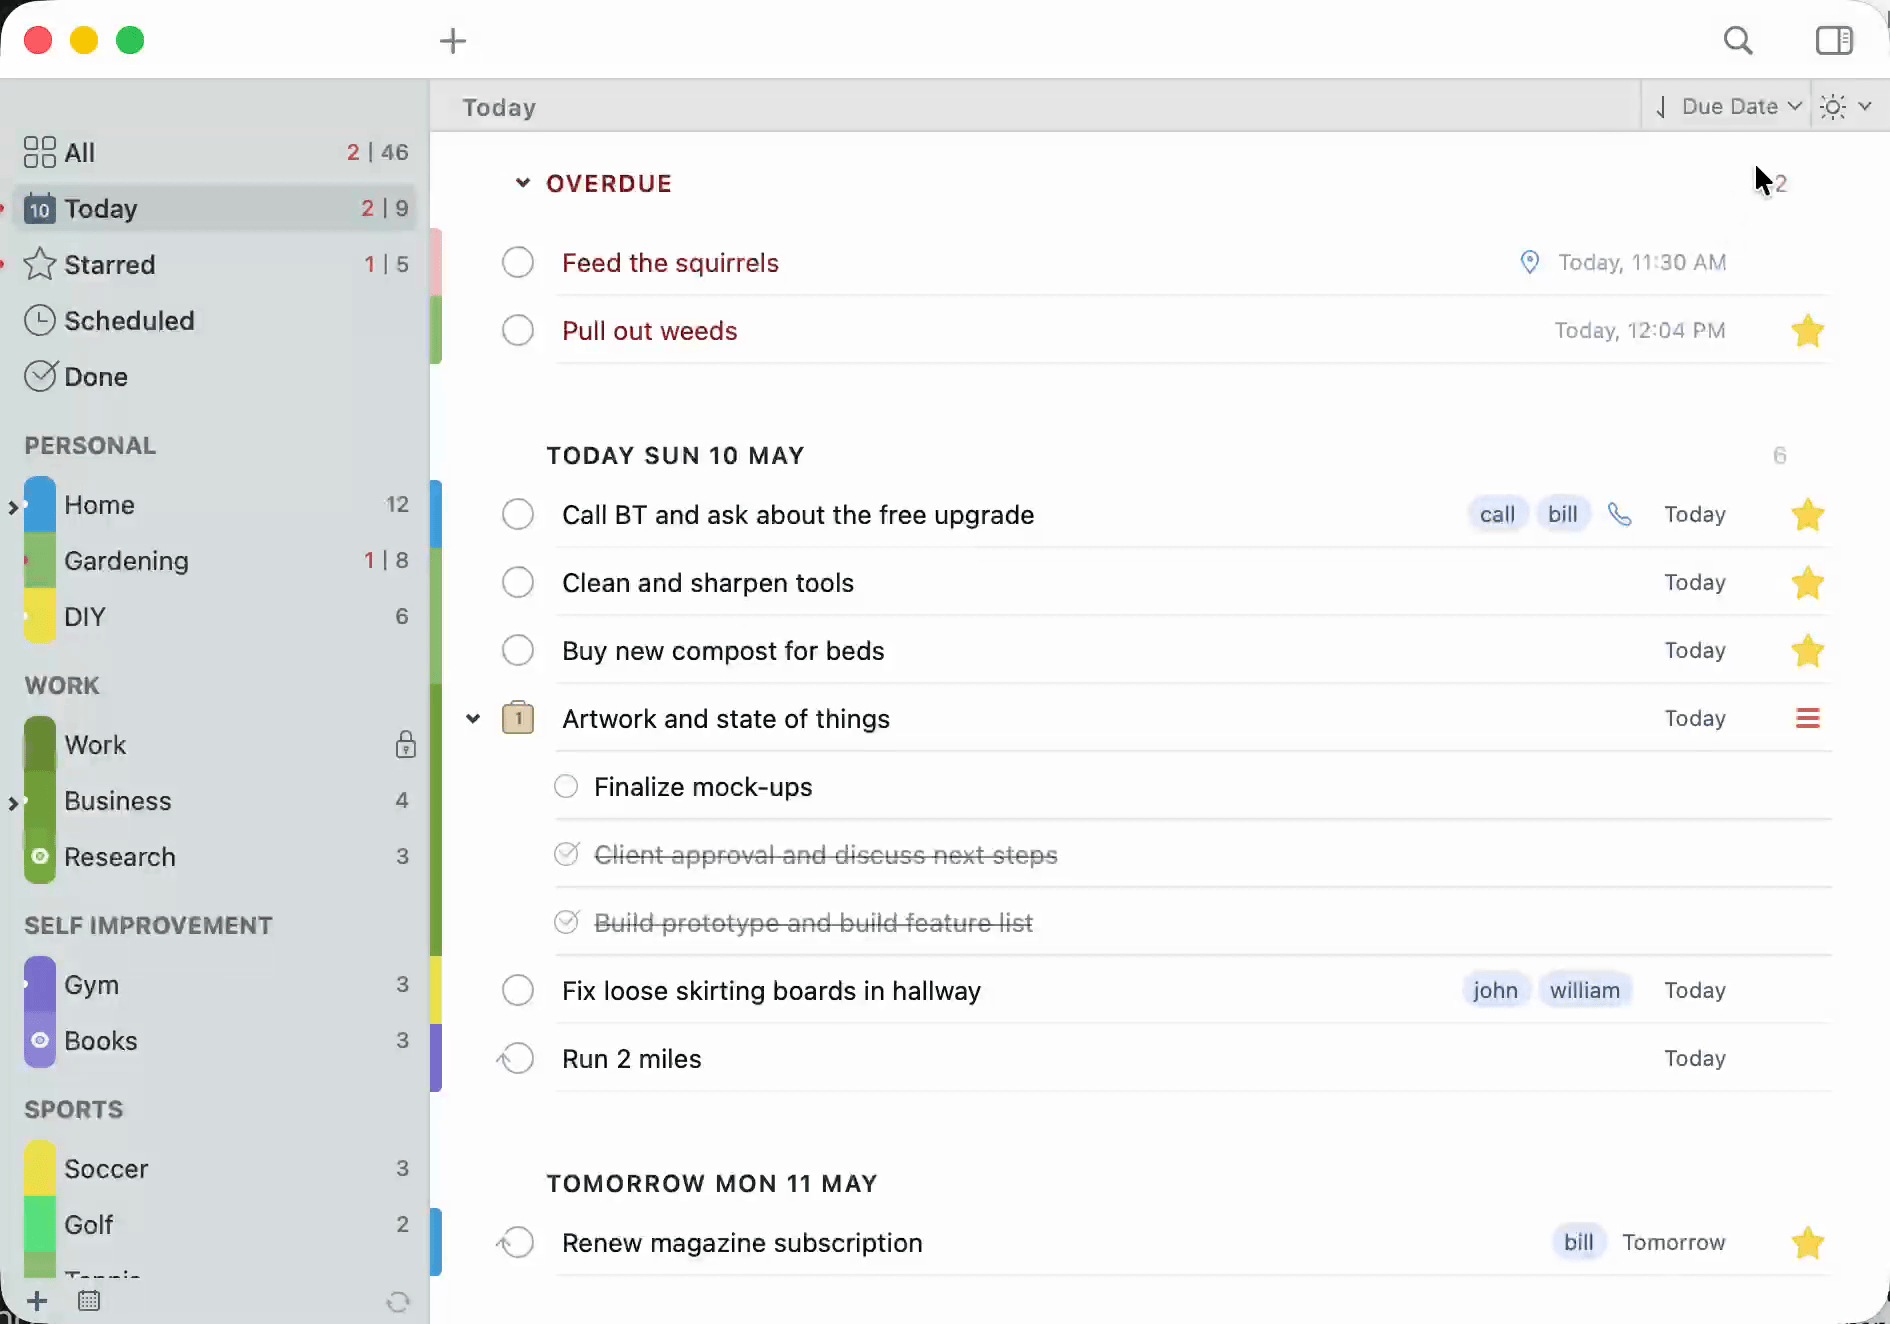
Toolbar
The strip along the top of the window is the window header. The controls you'll reach for most:
- Toggle List Panel: a sidebar button at the leading (left) edge shows or hides the Lists Panel for a focused, single-pane view.
- New (
+): click the+button for a New Task, or use its dropdown for a New Project, New Checklist, or New Sub-Task (shortcuts⌘N,⌥⌘N,⌃⌘N,⌃⌥N). The small[+]on a list row does the same, aimed at that specific list. - Search: a search field sits in the header at all times.
⌘F(Edit > Find > Find…) moves focus into it; see the Global Search Bar. - Toggle Tags Panel: a button at the trailing (right) edge shows or hides the Utility Panel (Tags / Locations). The same toggle is in the menu bar as View > Show Tags / Hide Tags.
- Sync: triggers a manual sync and shows the last-sync status.
Just below the toolbar sits the Sort Bar, which handles sorting, revealing hidden tasks, and the Focus Filter.
Task, Project, Checklist, or Sub-Task?
The New button creates four kinds of item, and choosing the right one matters:
- Task: a single standalone item. It can carry its own dates, alerts, tags, notes, an action, and even its own sub-tasks.
- Project: a container for related work where each sub-task keeps its own due date, start date, alerts, and tags, and appears individually in your Focus Lists. Reach for a project when every step needs its own schedule.
- Checklist: a lighter container for items that only matter together (a packing list, a recipe). A checklist's items are deliberately simple: they do not have their own due or start dates (they inherit scheduling from the checklist), though they can still carry tags; the whole checklist behaves as a single item in your Focus Lists. Reach for a checklist when the steps just need ticking off together.
- Sub-Task: an item nested inside a project or checklist.
For the full breakdown, see Projects and Checklists.
Mini Calendar (below the Lists Panel)
A compact month calendar lives just below the Lists Panel on the left side of the window, and scrolls from one month to the next. It does more than display the date:
- Busy days: every date with a task starting or due is marked. Heat Map (the default) tints the date, deepening through ten steps as the number of tasks rises; Dots puts small dots under it instead; None turns the markers off. Set the style under Settings > Appearance > Mini Calendar. Future occurrences of repeating tasks are marked too, so a glance at the calendar shows you what's coming.
- Click any day to filter the Task List to tasks due on that day. Click the day again to clear the filter.
- Click and drag across a range of days to filter to a date range, perfect for "what's due this week?"
- Drag a task onto a date in the mini calendar to defer it to that date. The task's due date updates automatically. A hidden calendar appears while you drag, and holding the task over the top or bottom row of weeks moves to the previous or next month, one month per pause.
- Hold
⌥(Option) and click any date to create a new task with that day as its due date.
So the mini calendar handles browsing dates, filtering, deferring, and creating tasks, all without leaving the main window.
The Sort Bar
Just below the toolbar sits the Sort Bar, a single strip holding several controls:
- Left: the name of the currently selected list. Click the list name to open the List Jump Bar and type part of any list, project, or checklist name to jump straight to it (the same bar you get from View > List Jump Bar... or the bare
Jkey). When you click into a project or its sub-task, a small briefcase button appears here too, toggling Project View. - Right: Reveal hidden tasks. Some tasks are hidden from the list on purpose: those with a future start date (held back by Smart Scheduling), and those carrying a paused tag. When a list is hiding tasks like these, a small visibility toggle appears here; flip it to show them alongside everything else, then flip it back. (The same reveal is on the Task menu: Show Scheduled
⌘K, Show Paused⌘U, and Show Scheduled & Paused⇧⌘Kfor both at once.) - Hide Completed (
⌘O), on the Task menu, temporarily suppresses completed tasks everywhere, ignoring whatever Show completed tasks for is set to under Settings > Tasks. The menu title flips to Show Completed while it's on; choose it again to go back to your normal setting. It's a quick way to hide completed tasks mid-session without changing a preference. - Right: Sort method and direction. A dropdown picks the sort method (the full range listed under Task List above), and a small arrow next to it flips between ascending and descending order.
- Right: Focus Filter. A two-part control: a single button toggles the focus filter on or off, and the dropdown alongside it picks which conditions to combine. Each list remembers its own focus settings.
The Focus Filter dropdown lets you tick more than one built-in condition at a time. Conditions are combined with "or", so ticking High Priority and This Week shows everything that is high priority plus everything due this week, not only the tasks that are both. From then on, a single click on the Focus button switches between your full task list and the focused subset.
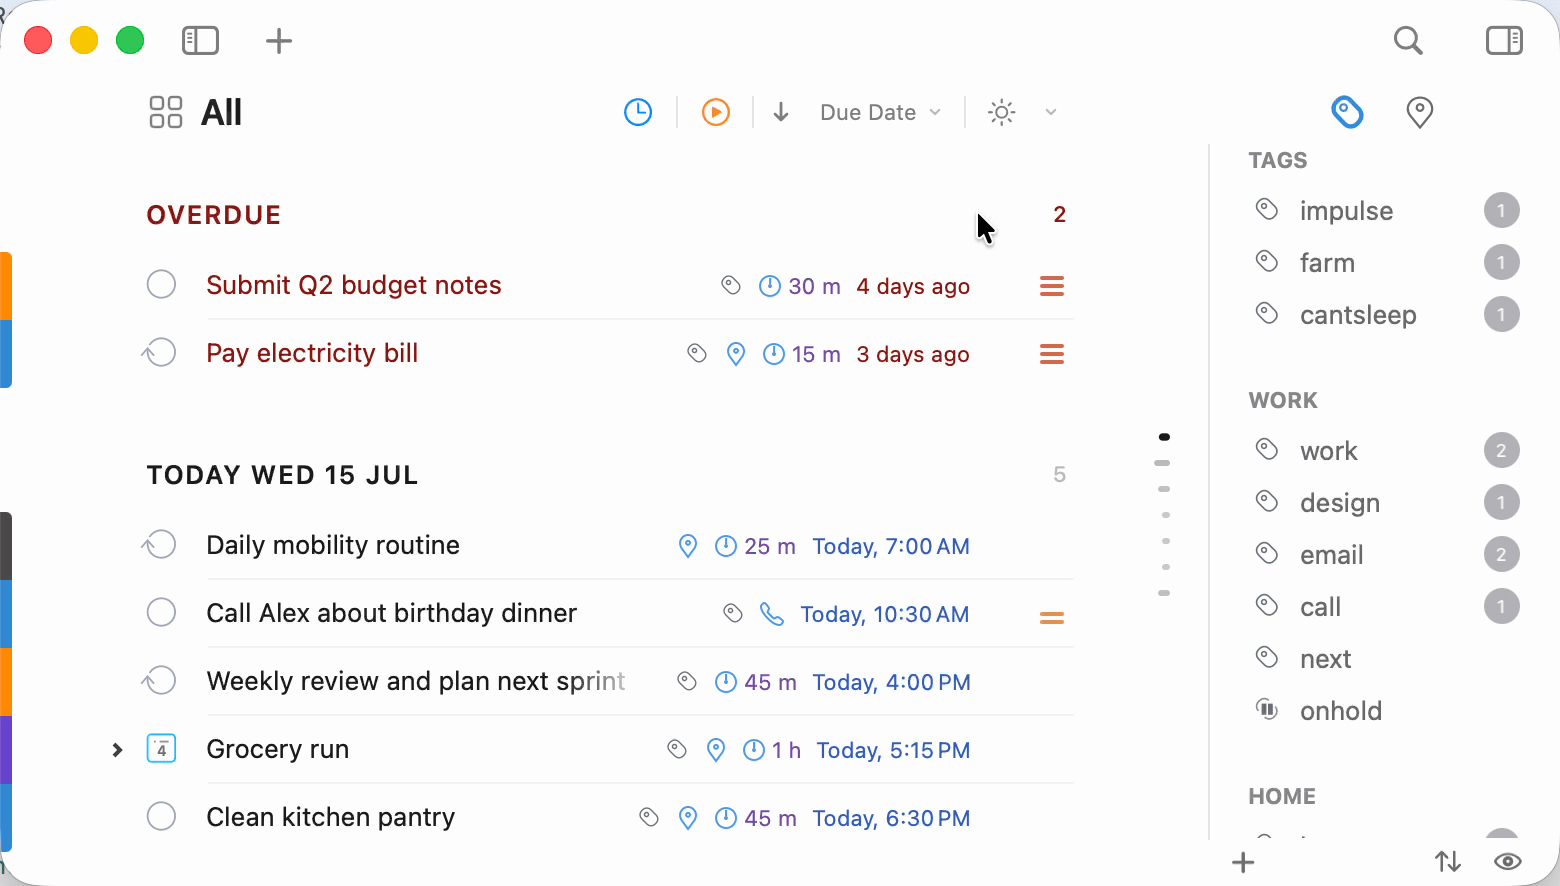
Project View
When you select a project or one of its sub-tasks, a small briefcase button appears next to the list name in the Sort Bar. Click it (or press ⌥⌘J, Task > Toggle Project View) to enter Project View: the rest of the list collapses away and you see only that project and its sub-tasks, so you can work on one plan without the rest of the list in view. Click the list name again (or press ⌥⌘J) to step back out to the full list.
By default your active search still applies inside Project View. If you'd rather always see every sub-task, turn off Inherit Search in 2Do > Settings > Today & Lists. See Projects and Checklists.

Search and Jump Bars
2Do has four in-window find surfaces: one in the toolbar, and three in-place jump bars triggered by bare-key shortcuts when the matching area has focus.
- Global Search Bar (
⌘F): filter the task list with Smart Filter syntax and save the filter as a Smart List. - Task Find Bar (bare
F): jump the selection to a task by title within the current list, without filtering. - List Jump Bar (bare
J): jump to a list in the Lists Panel by name. - Tag Search Bar (bare
/): find a tag in the Tags panel by name.
Each is built for a specific kind of "find me this" moment. For the full anatomy, see Search and Jump Bars.
There's also Quick Open (⇧⌘O), a Spotlight-style overlay that jumps to any task or list across the whole app, rather than searching within one area.
Jump Back to a Recent Task
View > Show Last Selected Task (⇧F5) walks you backward through the tasks you've recently selected. Press it once to return to the previously selected task; press it again to step further back through your history. 2Do switches lists automatically as it goes: if an earlier task lives in another list or inside a focused project, it takes you there and reveals it, even past an active focus filter or search. Keep pressing to keep going back; it wraps around once it reaches the oldest remembered task.
Window States
- Full Screen:
⌃⌘Ftoggles full screen. - Multiple Windows: open additional windows of 2Do via File > New Window (
⌃⌥⌘N), useful for keeping a reference list visible while you work in another. Each window keeps its own list selection, task selection, search, and layout. See Multiple Windows.
Text Size
Task text scales through nine named steps, from Tiny up through Small, Normal, Big, Large, Larger, Huge, Massive, and Giant. Pick one directly from View > Font Size, or step through them with ⌘= and ⌘-. The same scale is on the Text Size slider under Settings > Appearance, so use whichever you reach for first.
Customizing the Window
Most layout details live in Settings:
- Content width, under Settings > Appearance (text size is covered above).
- Separate Light and Dark themes that follow your Mac's system appearance (assign the same theme to both slots for one constant look), under Settings > Appearance.
- Whether completed tasks stay visible, and for how long, under Settings > Tasks.
- Whether Today includes overdue, starred, or "Still Working On" tasks, under Settings > Today & Lists.
- Whether Focus Lists show matching sub-tasks separately, under Settings > Today & Lists.